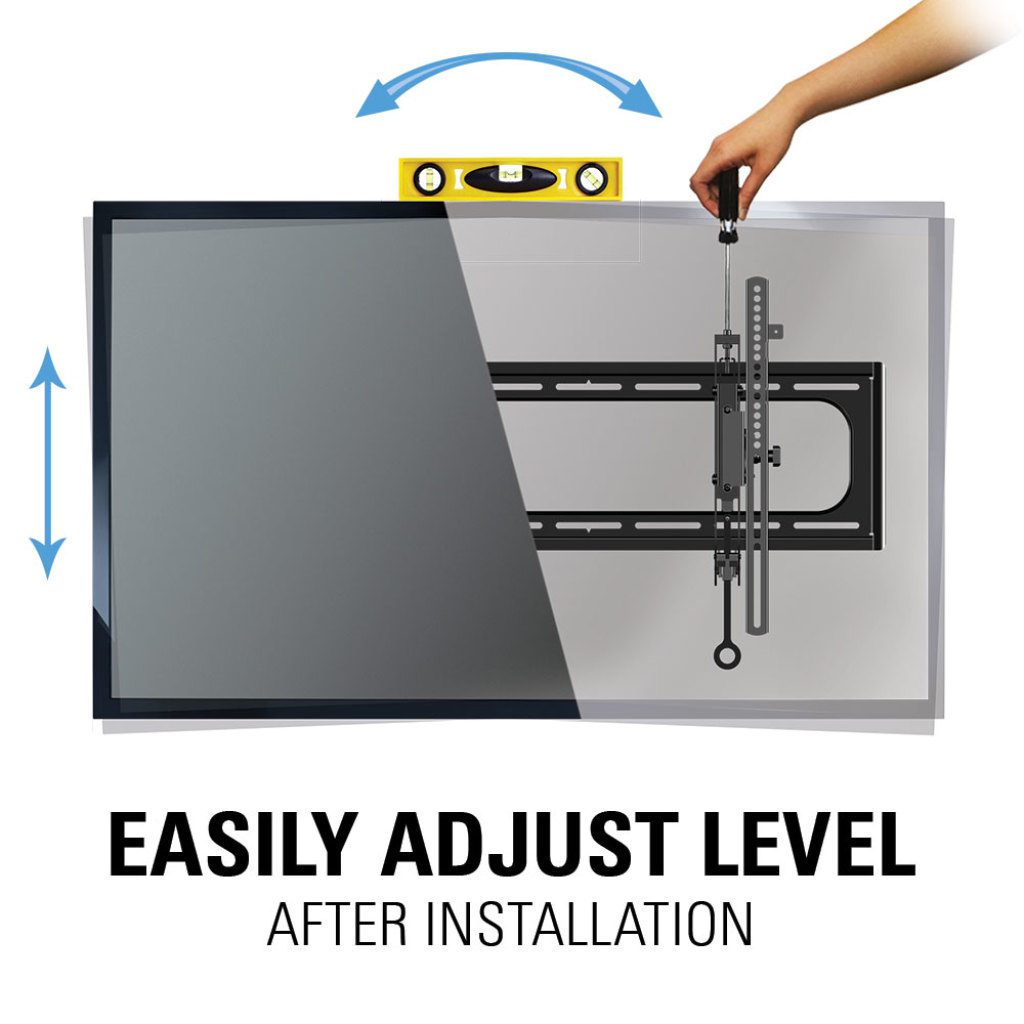
Leveling a TV on a wall mount can be done by adjusting the mount’s tilt and horizontal positions. To do this, loosen the screws on the mount, adjust the TV’s position, and then tighten the screws back in place.
Mounting a TV on the wall can be a great way to save space and enhance the overall look of your room. However, achieving a perfectly level position can be a bit challenging. Without the right technique, your TV may end up crooked or incorrectly aligned.
In this guide, we will provide you with simple steps to level your TV on a wall mount, ensuring optimal viewing and a professional appearance. So, whether you are a DIY enthusiast or a beginner, these instructions will help you achieve a perfectly level TV in no time. Just follow the steps below to get started.

Credit: www.amazon.com
Choosing The Right Wall Mount
Achieve a perfectly level TV on your wall mount with these expert tips. Find the right wall mount for your TV size and weight, follow proper installation steps, and use a leveling tool for accurate alignment. Increase your viewing pleasure with a perfectly positioned TV.
When it comes to mounting your TV on the wall, choosing the right wall mount is key to ensure a secure and level installation. Consider the TV size and weight, check the VESA compatibility, and decide on the mount type. By following these steps, you can achieve the perfect TV placement for optimal viewing pleasure.
Consider The Tv Size And Weight
Before selecting a wall mount, it is important to take into account the size and weight of your TV. This information can usually be found in the TV’s specifications or user manual. The size of the TV will determine whether you need a larger or smaller wall mount, while the weight will help you choose a mount that can support the TV without any risk of it falling.
Check The Vesa Compatibility
One of the most crucial factors in selecting a wall mount is ensuring its compatibility with your TV’s VESA standard. The VESA (Video Electronics Standards Association) standard specifies the placement of the mounting holes on the back of the TV. To determine the VESA pattern of your TV, simply measure the horizontal and vertical distances between the mounting holes. Once you have this information, you can ensure that the wall mount you choose is compatible with your TV’s VESA pattern.
Decide On The Mount Type
There are different types of wall mounts available, each catering to specific needs and preferences. Here are a few common mount types:
- Fixed Mount: This type of mount holds the TV flush against the wall, providing a clean and low-profile look. It is ideal for rooms where the viewing angle does not need to be adjusted.
- Tilt Mount: A tilt mount allows you to adjust the vertical angle of the TV. This is useful when the TV needs to be mounted higher on the wall, allowing for a comfortable viewing experience.
- Full-Motion Mount: Also known as articulating or swivel mounts, full-motion mounts offer the most flexibility. They allow you to tilt, swivel, and extend the TV to achieve the desired viewing angle from any position in the room.
By considering your specific needs, room layout, and viewing preferences, you can choose the mount type that best suits your requirements.
Gathering The Necessary Tools
Before you begin the process of leveling your TV on a wall mount, it’s important to gather the necessary tools. Having these items on hand will make the installation easier and more efficient. Here are the tools you’ll need:
Strongstud Finder/strong
Using a stud finder is crucial to ensure that your TV mount is securely anchored to the wall. This tool detects the presence of studs, beams, or any other solid structure behind the drywall.
Stronglevel/strong
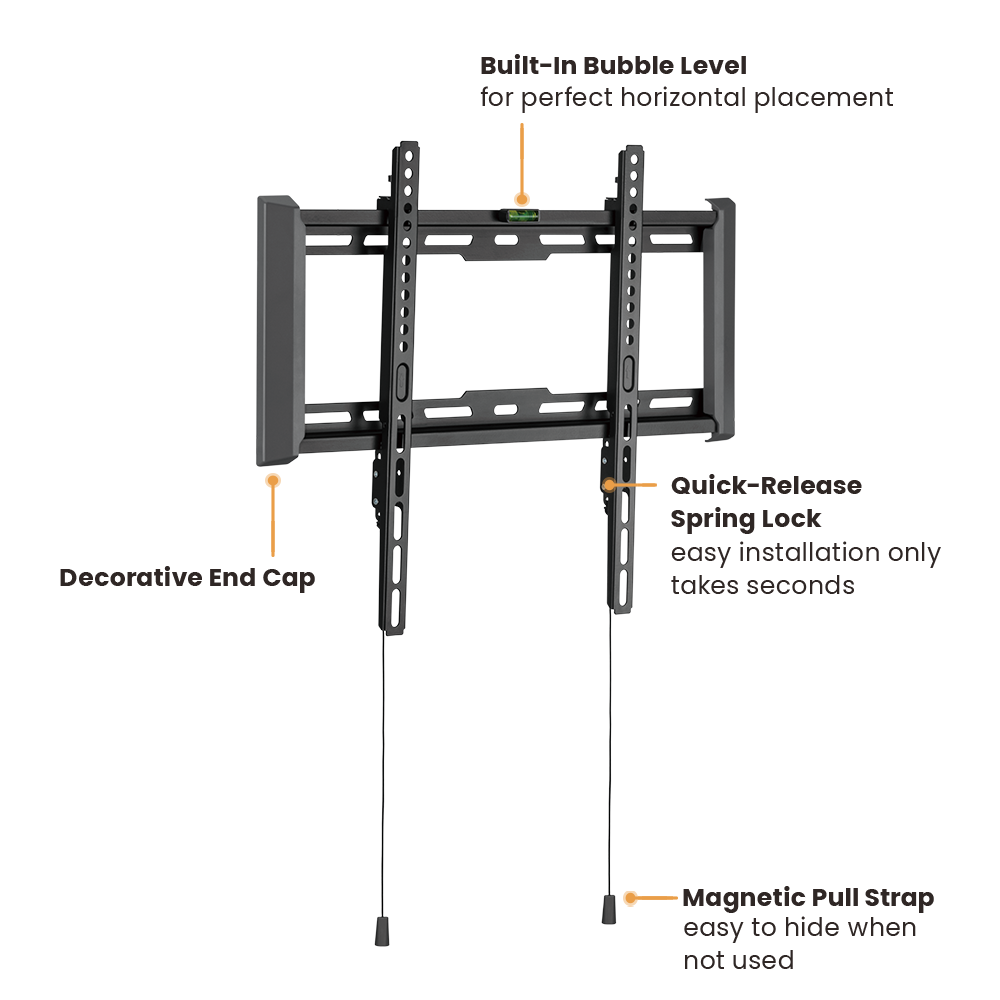
Using a level will help you ensure that your TV is perfectly straight and not tilted to one side. A level is essential to achieving a professional-looking installation.
Strongdrill/strong
You’ll need a drill to create holes in the wall for your TV mount. Make sure you have the appropriate drill bits for the type of wall you have, whether it’s drywall, concrete, or brick.
Strongscrewdriver Or Wrench/strong
Depending on the type of TV mount you have, you’ll need a screwdriver or wrench to tighten the screws and secure the mount to the wall. Check the instructions provided with your wall mount to determine the appropriate tool.
Strongmeasuring Tape/strong
Using a measuring tape is crucial for determining the right height and position for mounting your TV. Measure the distance between the holes on the back of your TV to ensure they align with the mounting bracket.
Having these tools at your disposal will save you time and frustration during the TV wall mount installation process. Before you start, make sure you have each tool within reach so that you can complete the job smoothly and efficiently.
Locating The Wall Studs
Before you start mounting your TV on the wall, it’s important to locate the wall studs. These vertical wooden beams provide the necessary support for your TV and ensure it stays securely in place. Without locating the studs, you run the risk of your TV falling off the wall, causing damage to both your TV and your home.
Use A Stud Finder
One of the easiest and most accurate ways to locate wall studs is by using a stud finder. This small handheld device emits a small electric current or uses a magnet to detect the density changes in the wall. Simply place the stud finder against the wall and move it horizontally until you hear a beep or see a light indicating the presence of a stud. Mark the location with a pencil or tape for reference.
Tap The Wall For Hollow Sounds
If you don’t have a stud finder, you can still locate wall studs by tapping the wall and listening for hollow sounds. Start by tapping the wall along the baseboard or trim, moving upward in a vertical line. When you tap on a stud, it will produce a solid, thud-like sound compared to the hollow sound of the spaces between the studs. To increase accuracy, tap the wall on multiple spots and mark the areas where you hear the solid sound.
Once you have located the studs, you can proceed with confidence knowing that your TV will be securely mounted to the wall. Remember to use quality wall mounts and follow the manufacturer’s instructions for installation. Now let’s move on to the next step: levelling your TV on the wall mount.
Marking The Wall And Mounting Bracket
When it comes to mounting your TV on the wall, one of the most crucial steps is marking the wall and aligning the mounting bracket. This ensures that your TV is level and secure, providing you with an optimal viewing experience. In this article, we will guide you through the process of marking the wall and mounting the bracket in a few simple steps, so you can enjoy your favorite shows without any hassle.
Measure And Mark The Desired Height
To begin, measure and mark the desired height on the wall where you want to mount your TV. Consider factors such as eye level and optimal viewing angle when determining the height. Use a tape measure to measure and a pencil to mark the spot. It’s a good idea to double-check your measurements to ensure accuracy.
If you want to ensure precision, you can create a template by cutting out a piece of cardboard in the size of your TV and holding it against the wall to visualize the height before making any permanent marks. This allows you to make adjustments if needed without damaging your wall.
Align The Bracket With The Marks
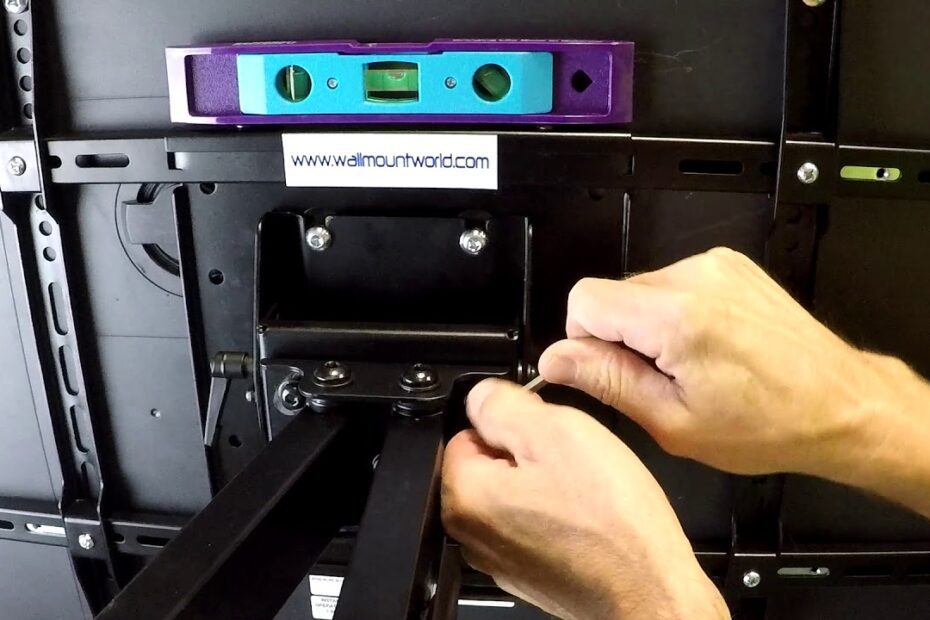
Next, it’s time to align the mounting bracket with the marks on the wall. Place the bracket against the wall, ensuring that it lines up with the height markings. Use a level to make sure the bracket is perfectly horizontal. This step is crucial to ensure that your TV is level when mounted.
Level The Bracket
Now, it’s time to level the bracket. Use the level to ensure that the bracket is both horizontal and vertical. Adjust the position if necessary to achieve a perfectly level mount. A level TV is not only aesthetically pleasing but also necessary for an optimal viewing experience. Take your time with this step to ensure accuracy.
Once the bracket is level, mark the screw holes on the wall through the holes in the bracket. This will serve as a guide when you are ready to secure the bracket to the wall.
After you have marked the screw holes, remove the mounting bracket from the wall and set it aside. Make sure to keep track of the positioning of the bracket to avoid any confusion later on.
Attaching The Wall Mount And Tv
Learn how to level your TV on a wall mount with these easy steps. Achieve the perfect alignment for optimal viewing experience.
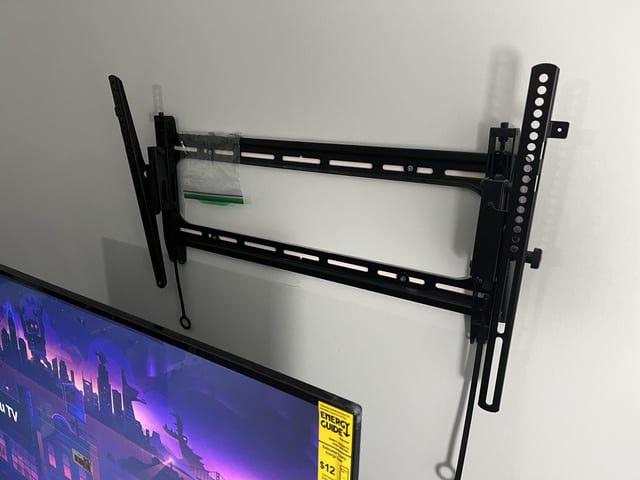
Attaching the Wall Mount and TV Now that you have successfully drilled pilot holes and prepared your wall for the wall mount, it’s time to move on to the next step: attaching the mount to the wall. This is a crucial step in ensuring that your TV is securely mounted and level. Drill pilot holes: Before attaching the wall mount, it’s important to drill pilot holes in the designated spots on the wall. These pilot holes will provide a guide for attaching the mount and ensure that it is firmly secured. Use an electric drill and a drill bit that is slightly smaller than the diameter of the screws provided with the wall mount. Attach the mount to the wall: Once the pilot holes are drilled, it’s time to attach the wall mount. Place the mount against the wall, aligning the pilot holes with the holes on the mount. Insert the screws through the mount and into the pilot holes, ensuring that they are tightened securely. Use a screwdriver or a drill with a screwdriver attachment to do this. Attach the TV to the mount: After securing the wall mount, it’s time to attach your TV. This step requires caution and precision to ensure the TV is mounted correctly. Follow the manufacturer’s instructions for your specific TV model to guide you through the process. Most wall mounts have a bracket or plate that needs to be attached to the back of the TV. Secure the bracket or plate to the TV using the screws provided. Once the bracket or plate is attached to the TV, carefully lift the TV and align it with the wall mount. Slide the TV onto the mount, making sure it engages with the mount securely. Check for any wobbling or instability, and make any necessary adjustments to ensure the TV is level. Now that you have successfully attached the wall mount and TV, take a step back and admire your work. Your TV should now be securely mounted on the wall, providing you with a comfortable and enjoyable viewing experience.
Credit: www.sanus.com
Credit: www.lumi.cn
Frequently Asked Questions On How To Level Tv On Wall Mount
Why Is My Tv Not Level With Wall Mount?
Your TV may not be level with the wall mount due to incorrect installation. Ensure that the wall mount is properly secured and leveled. Check if there are any adjustments or screws to align the TV correctly. If required, seek professional assistance to ensure a level TV placement.
How Do You Adjust The Tv Mounting Level?
To adjust the TV mounting level, start by checking the mounting brackets and ensuring they are securely attached. Then, use a level tool to align the TV horizontally and vertically. Make adjustments by loosening the brackets, repositioning the TV, and tightening the brackets again until the desired level is achieved.
How Do You Straighten A Tv On A Mount?
To straighten a TV on a mount, loosen the bolts on the mount, adjust the TV’s position, and then tighten the bolts again. Make sure the TV is level and aligned with the mount. Check for any tilting or misalignment, and make further adjustments if needed.
How Do You Angle A Wall Mounted Tv?
To angle a wall mounted TV, follow these steps: 1. Determine the desired viewing angle. 2. Use a TV mount with adjustable tilt. 3. Consider the height and distance from seating. 4. Make sure the TV is securely mounted. 5. Test the angle and adjust as necessary for optimal viewing.
Conclusion
Successfully leveling your TV on a wall mount is crucial to ensure optimal viewing experience. By following the steps mentioned in this blog post, which include measuring, marking, and adjusting the mount, you can achieve the desired level placement. Remember to use a spirit level and take your time while making adjustments.
Implement these tips to enjoy your favorite shows and movies without any tilted distractions.
- Unleash the Potential: Exploring the World of Ceiling TV Mounts - February 15, 2024
- How to Mount a Tv on a Swivel Stand - February 15, 2024
- How to Hang Tv Outside - February 14, 2024